

How To Find Baud Rate Of Serial Port Windows
Working with USB series devices isn't the virtually uncomplicated of workflows. We offset demand to identify the COM port, institute under Device Manager, then we need to tell our application to use that COM port.
What if we could receive an automatic notification of COM devices, so configure them to open with specific applications? Serial Port Notifier by Amr Bekhit is only what we need.
At the well-nigh basic level, Serial Port Notifier tells us when a device is continued / disconnected via a notification. But under the hood, we can give our devices custom names and create launchers that will open specific applications.
For this projection you will need
- PC running Windows ten / xi
- USB serial device such as a Raspberry Pi Pico
Installing Serial Port Notifier
one. Download Serial Port Notifier from SourceForge.
2. Allow the installer to make changes to your machine.
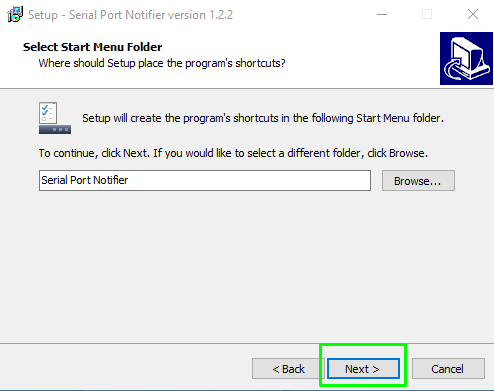
3. Click Next to take the default Showtime Bill of fare Folder.
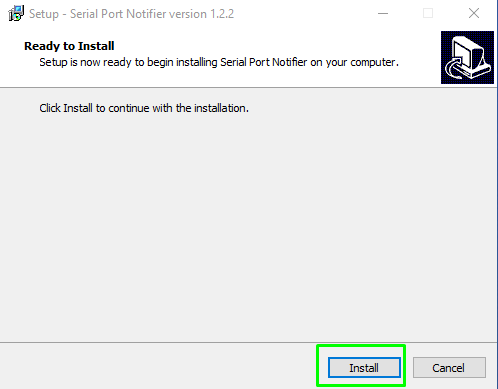
four. Click Install to finish the installation.

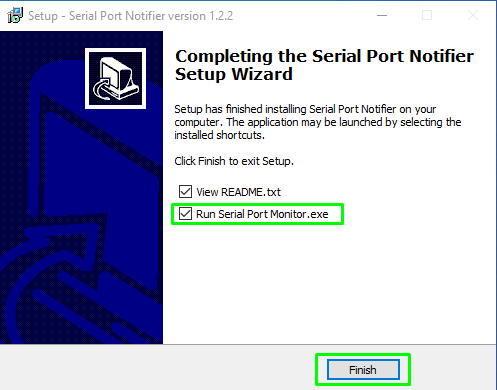
v. Click Finish to close the installer. In that location are 2 tick boxes. One for the readme file, the other launches the application. The readme is optional, but ensure "Run Serial Port Monitor.exe" is selected.
Using Serial Port Notifier
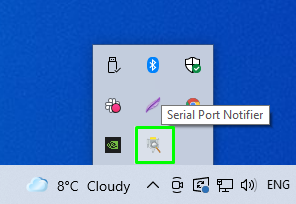
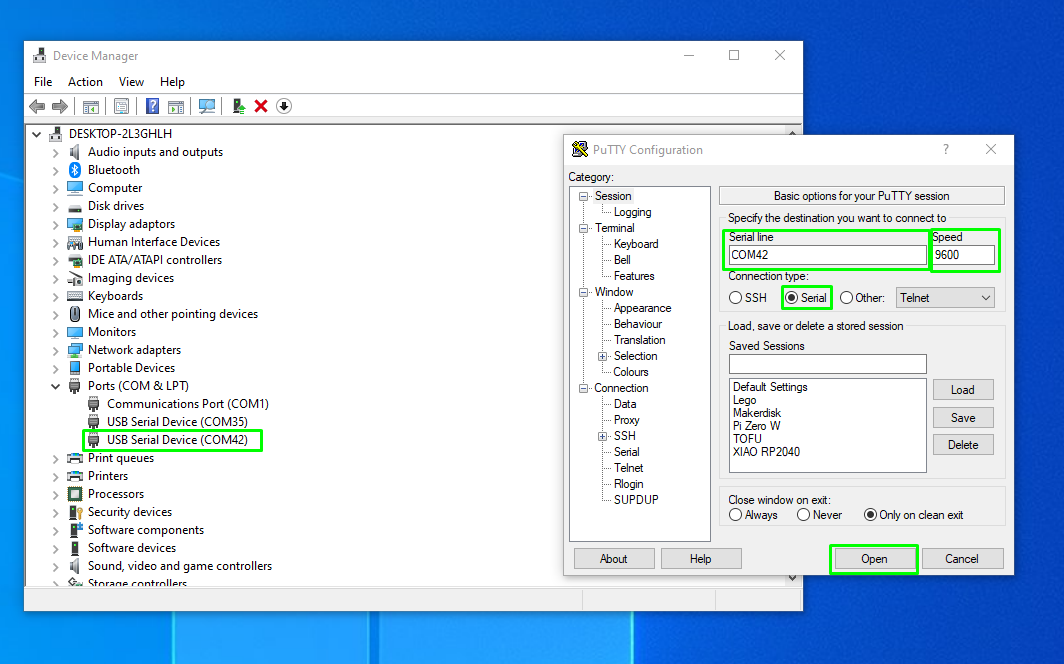
Serial Print Notifier lives in the Notifications surface area and, at the most basic level, it will automatically pop up should a USB / Serial device be connected / disconnected. Nosotros can employ the COM port value in our projects, for case flashing code to an Arduino, Raspberry Pi Pico or other microcontroller board.
The basic functionality works as follows.
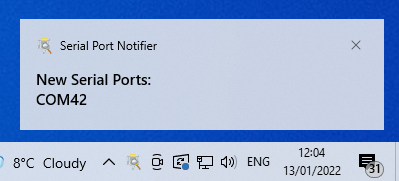
1. Insert a USB series device. We used a Raspberry Pi Pico running CircuitPython.
2. Take note of the notification that will appear in the Notifications area.
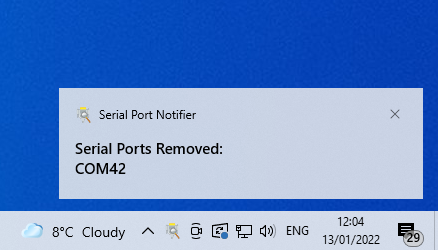
3. Remove the USB serial device.
4. Note that Series Port Notifier confirms the device has been removed.
COM port numbers are useful but being human we prefer names. Luckily we can rename a COM port for easy identification.
1. Connect your USB to serial device. We connected a Raspberry Pi Pico.
two. Make a note of the assigned COM port via the notification pop upwards.
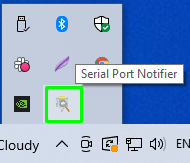
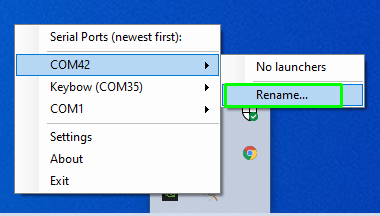
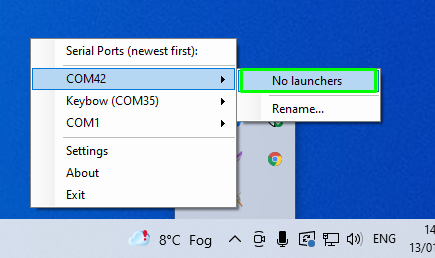
3. Left click on "Show Hidden Icons and then right click on the Serial Port Notifier icon.
4. Select the correct COM port and click Rename.
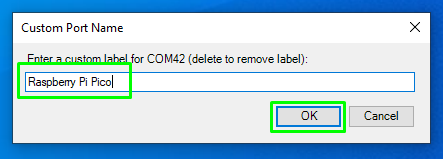
5. Enter a custom name for the device and click Ok to relieve.
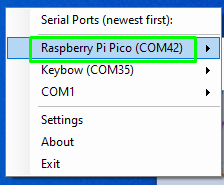
6. The COM port is at present identified using our preferred name.
Creating Custom Launchers
Serial Port Notifier has a neat feature, launchers. We can create custom launchers to open certain applications, or perform actions. These launchers work across all continued devices and are useful for mutual applications such every bit PuTTY.
We are going to create a launcher to first PuTTY, a terminal emulator which we tin use to control and communicate a device.
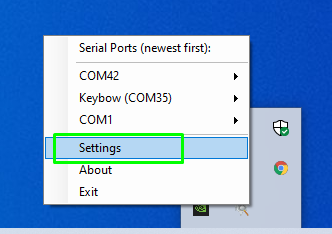
ane. Left click on "Show Hidden Icons and then right click on the Serial Port Notifier icon.
2. Click on Settings.
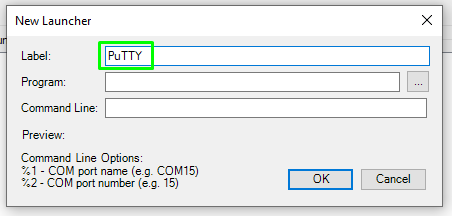
3. Click on New to create a new launcher.
4. Label the launcher "PuTTY".
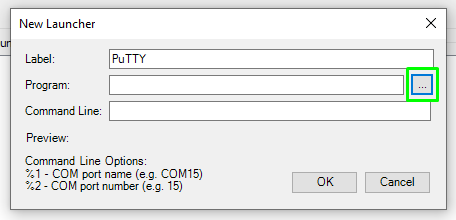
v. Click on the … icon and navigate to the PuTTY.exe file. Our PuTTY file was located in Plan Files > PuTTY.
6. For Command Line, enter the following to open PuTTY with specific connexion details. Click Ok to save. This line will prepare the baud rate (connection speed), 8 data bits, (n) no parity, i finish bit and (Due north) no menstruation control.
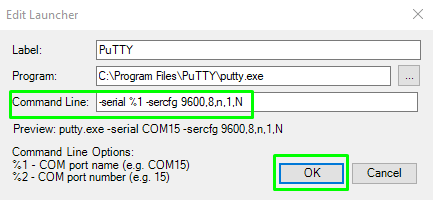
vii. Click Ok to save and close the Settings dialog.
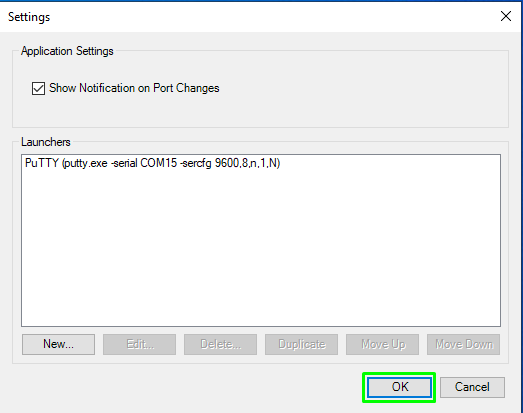
8. Become back to the Serial Print Notifier and select the correct COM port, then click on the launcher.

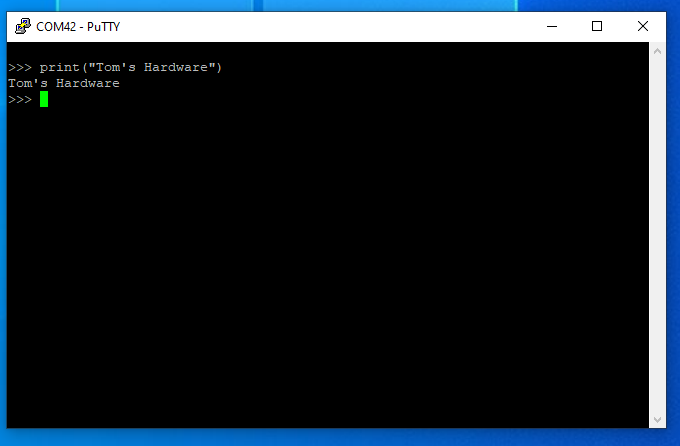
PuTTY will launch and be gear up for use with your USB series device.
Source: https://www.tomshardware.com/how-to/detect-com-port-windows-serial-port-notifier
Posted by: padillatront1952.blogspot.com
0 Response to "How To Find Baud Rate Of Serial Port Windows"
Post a Comment